
Managing Team Users with cPanel's Manage Team Feature
Manage Team lets a cPanel account owner create separate logins (“team users”) for developers, email administrators, and other collaborators — without sharing the main cPanel password. Each team user can be limited to only the roles and services they need, such as database access, email administration, or FTP.
Note: Up to 7 team users can have one or more Roles assigned (Administrator, Database, Email, Web). There is no fixed limit on team users who only have individual Services enabled (Email, FTP, Web Disk) without a Role. Team user usernames follow the format username@yourdomain.com.
Step 1: Open Manage Team
Log in to cPanel. On the home page, go to the Preferences section (or use the search bar) and select Manage Team.
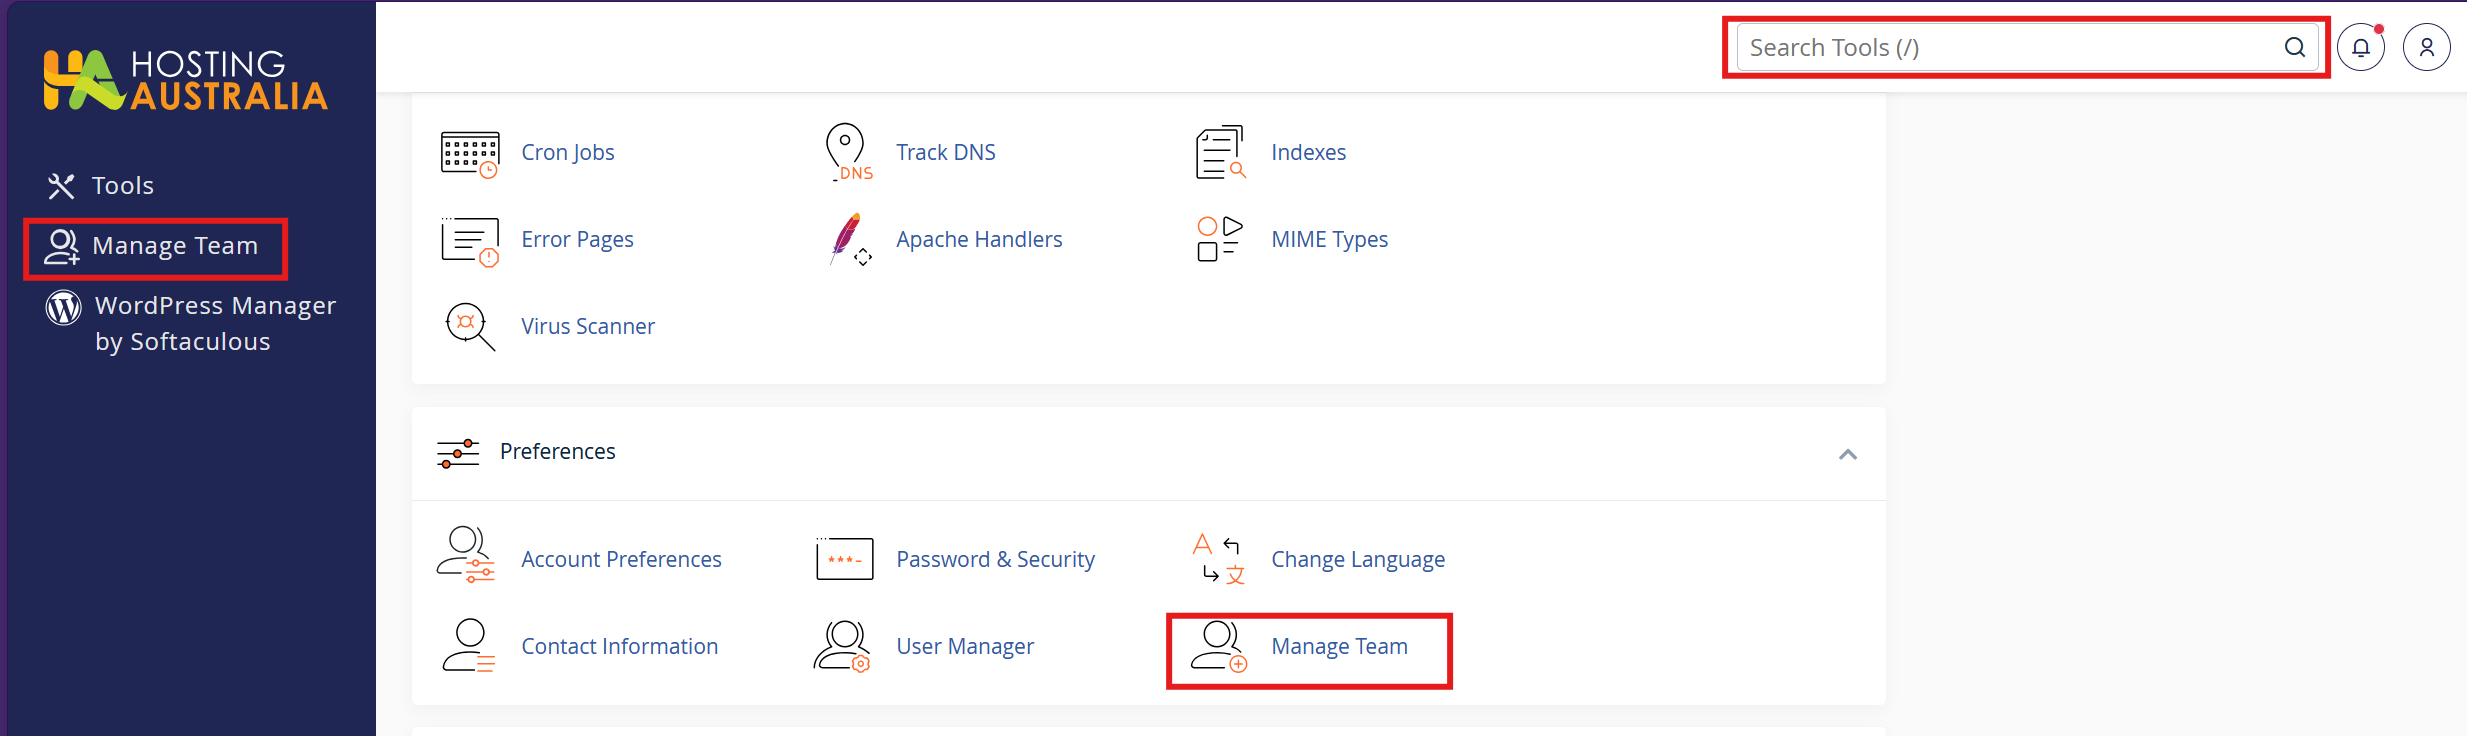
Step 2: Create a New Team User.
The Manage Team page lists any existing team users. Select + Create Team User to begin adding a new one.
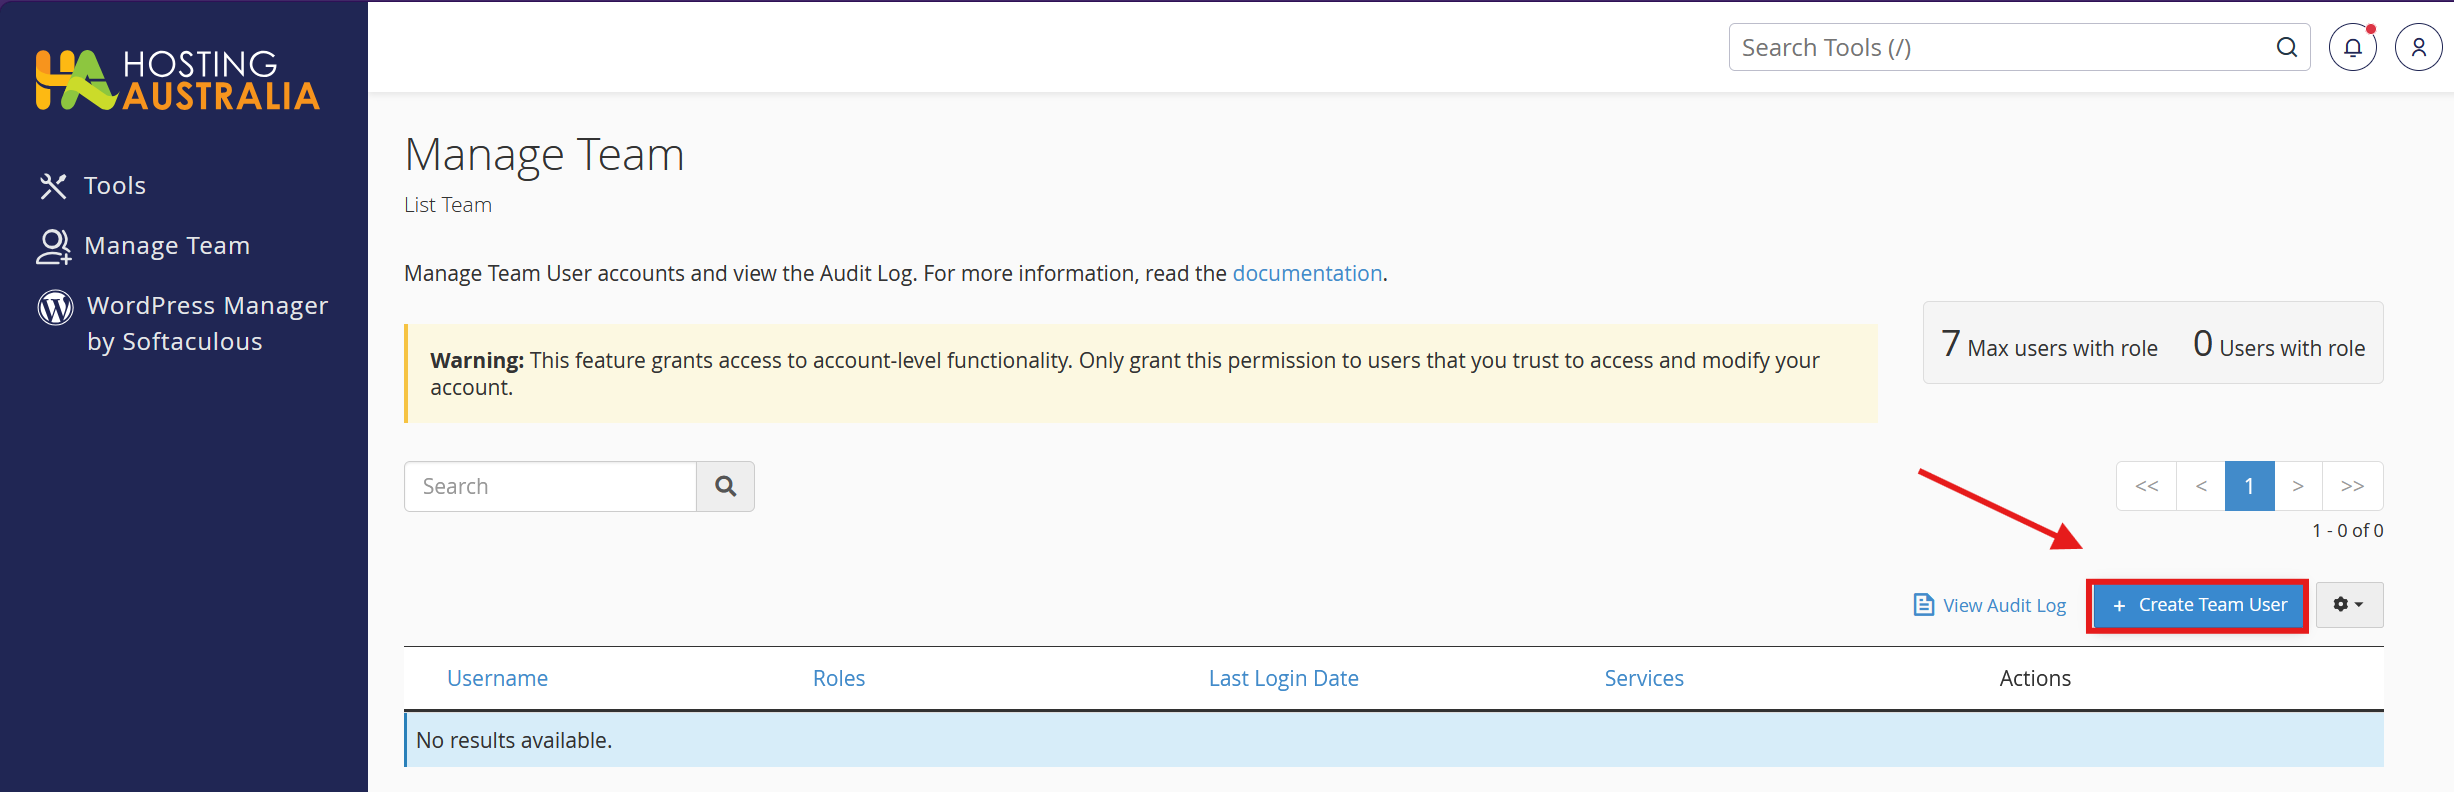
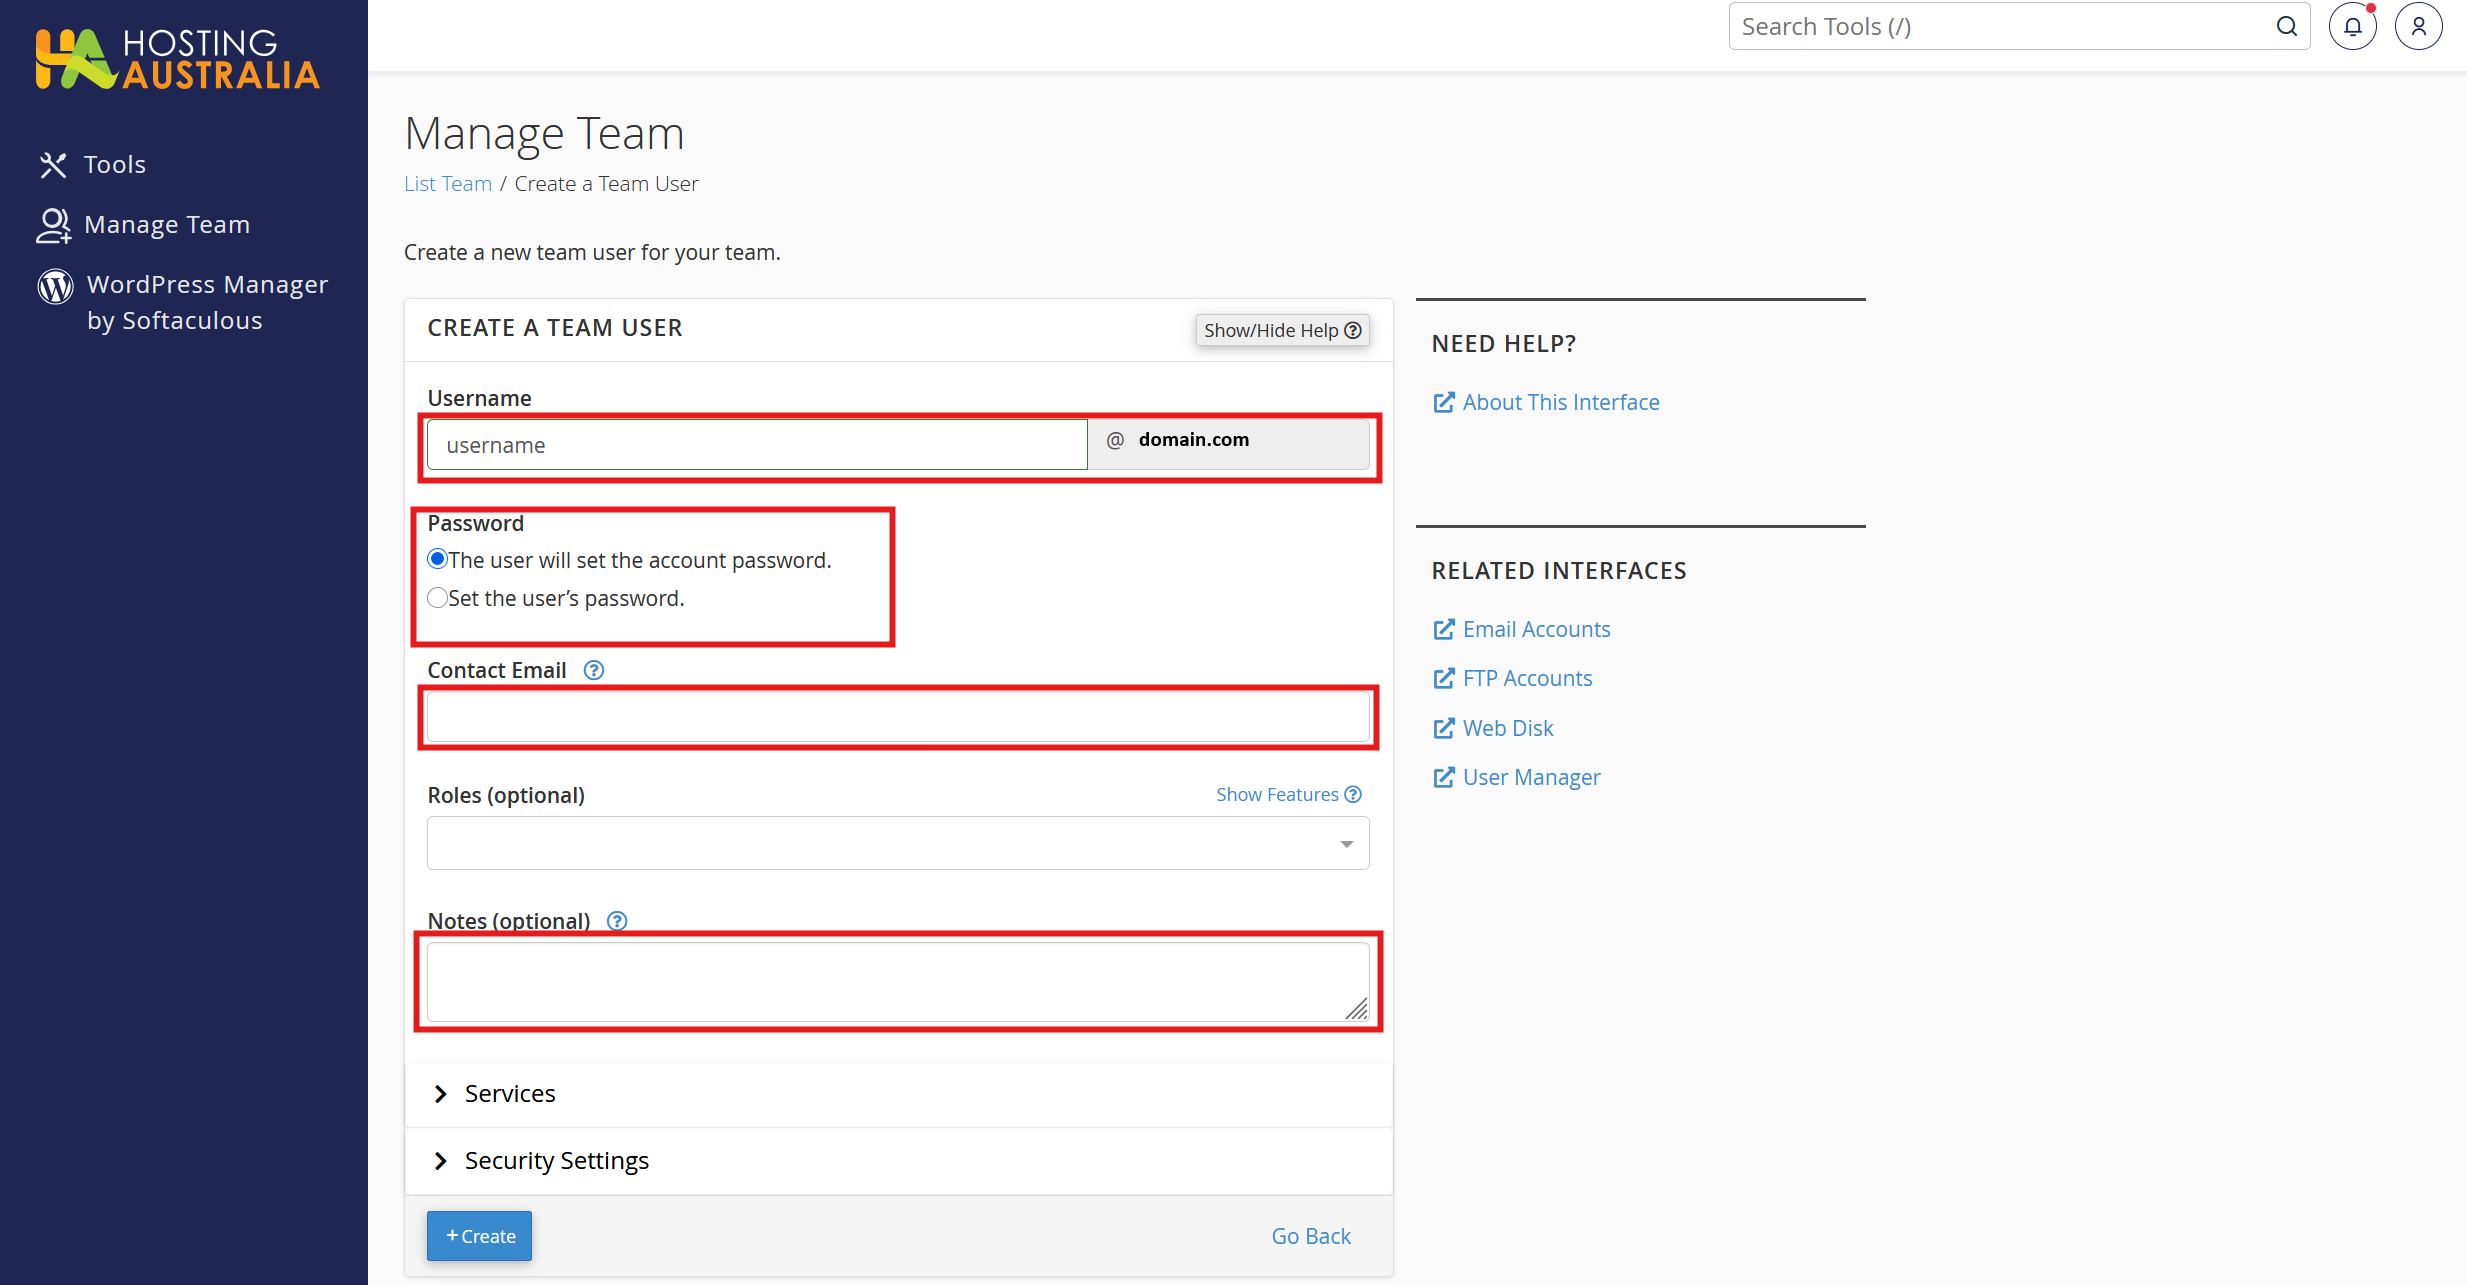
Step 3: Enter the Team's user details.
Enter a username (in the format username@yourdomain.com), choose whether the user sets their own password or you set one for them, and enter a contact email where the invitation and notifications will be sent. Notes are optional.
Step 4: Define the Role for the Team user.
Roles control account-level access. Choose the roles that match the person's job:
- Administrator - The administrator role includes all privileges of the other team user roles, that mean it has full access.
- Database - This role enables a team user to access tools and modify files related to database management for the team owner’s cPanel account.
- Email - This role enables a team user to access tools and modify files related to email administration for the team owner’s cPanel account, such as email routing and mailing lists.
- Web - This role enables a team user to access tools and modify files related to website functionality.
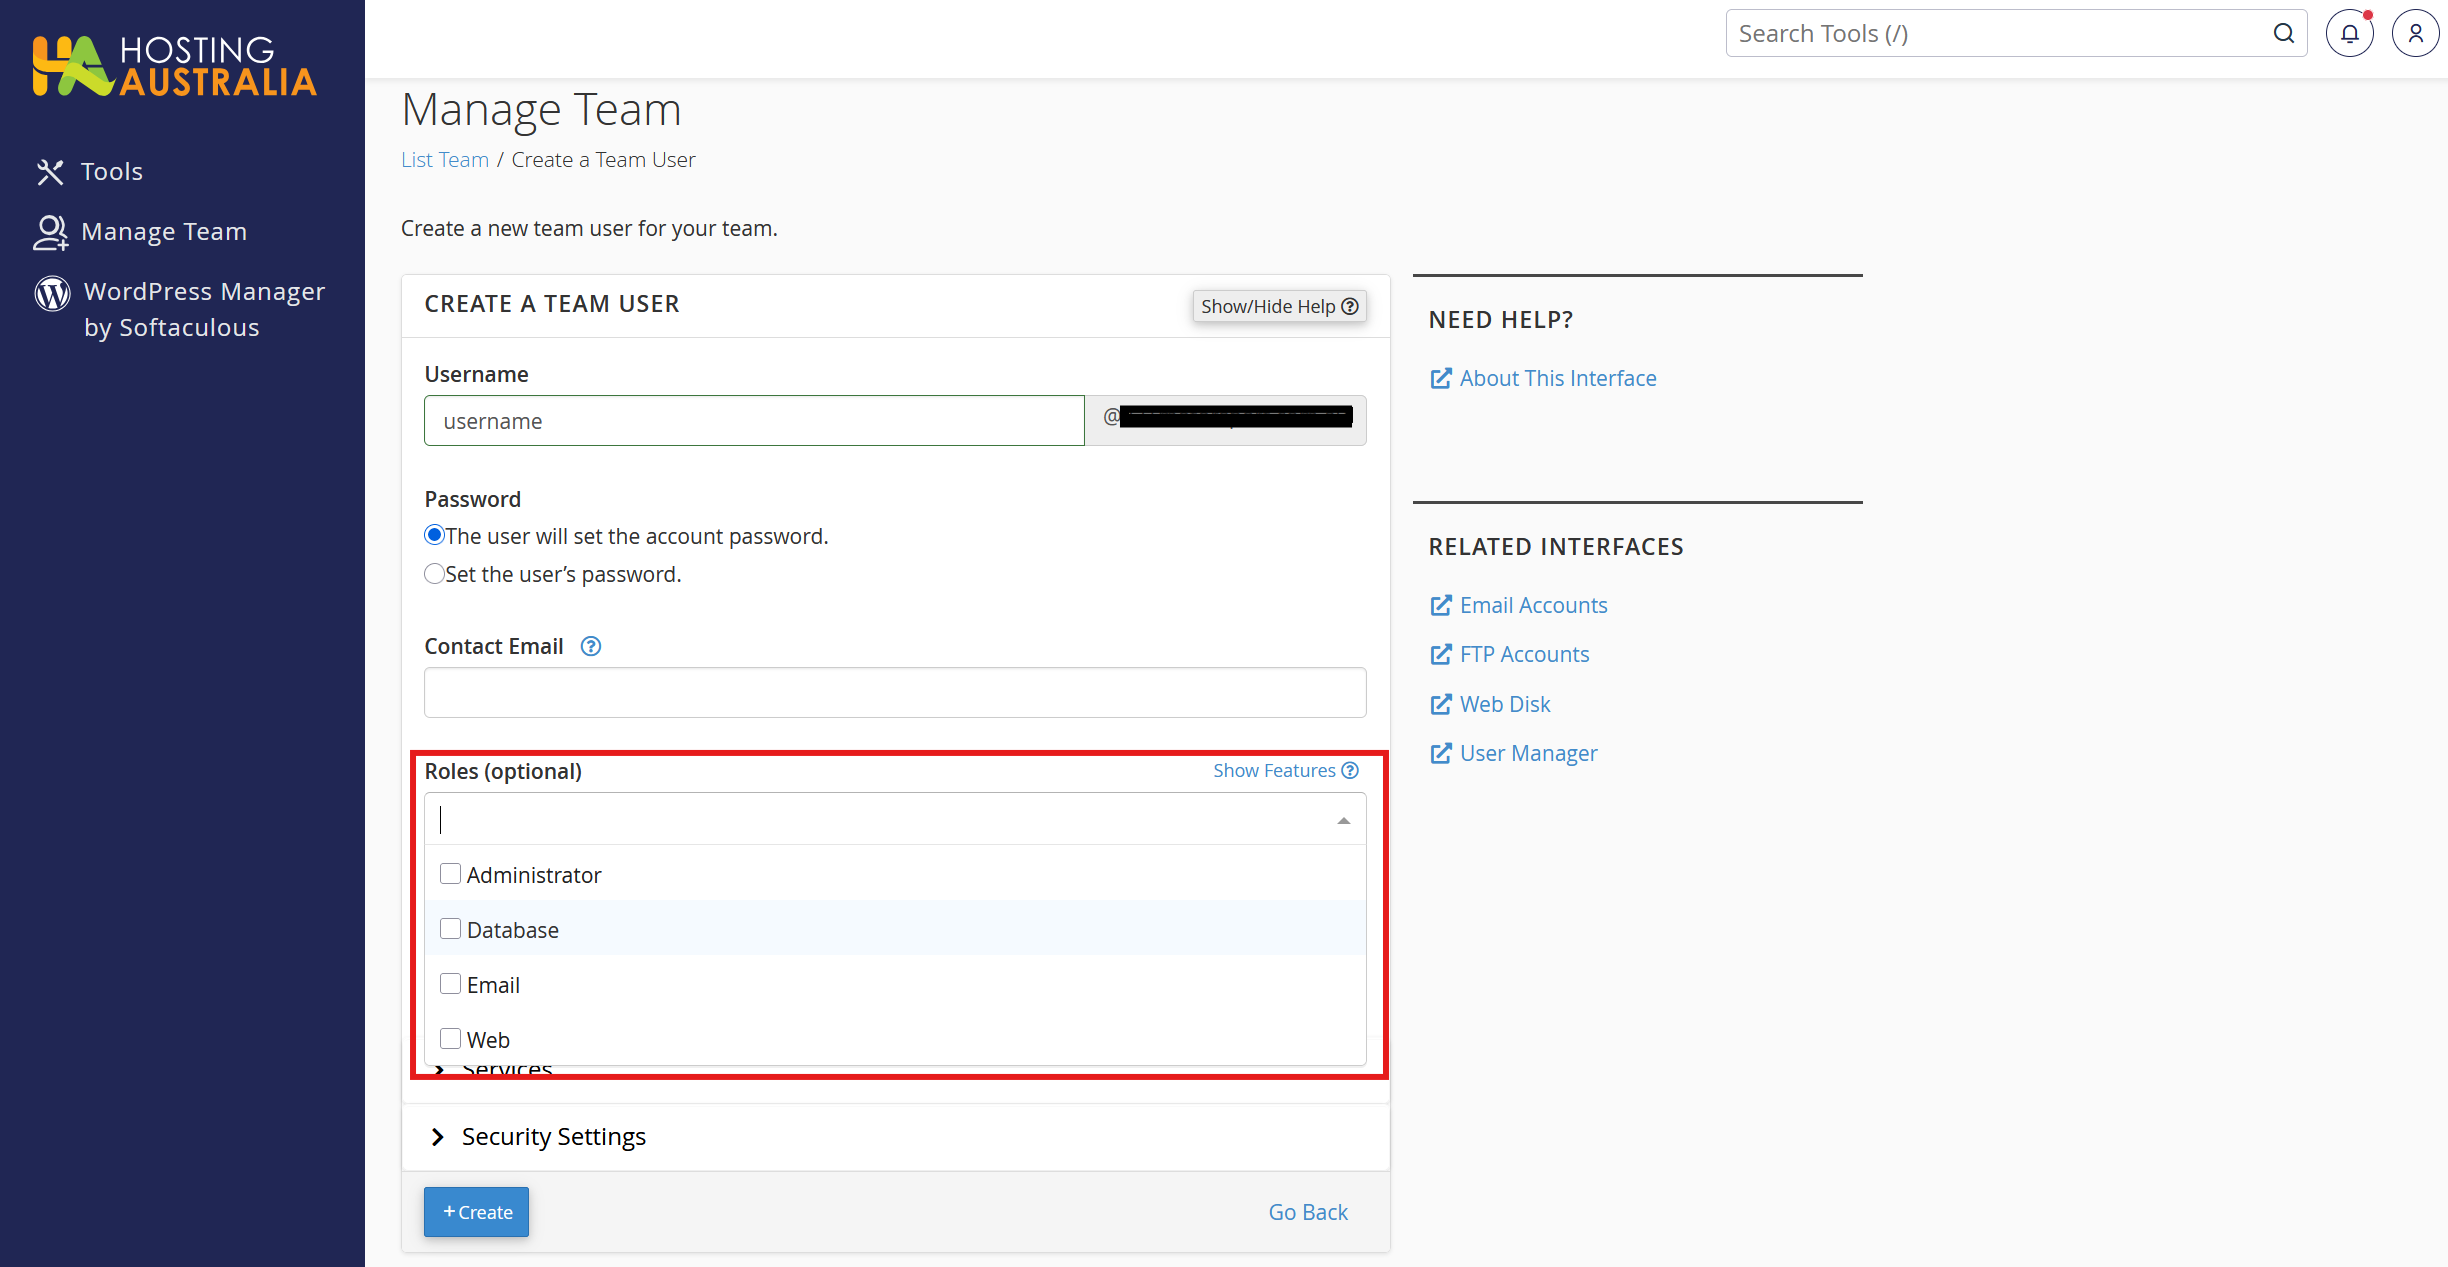
Note: You can click on the Show Feature link to see each roles function capability.
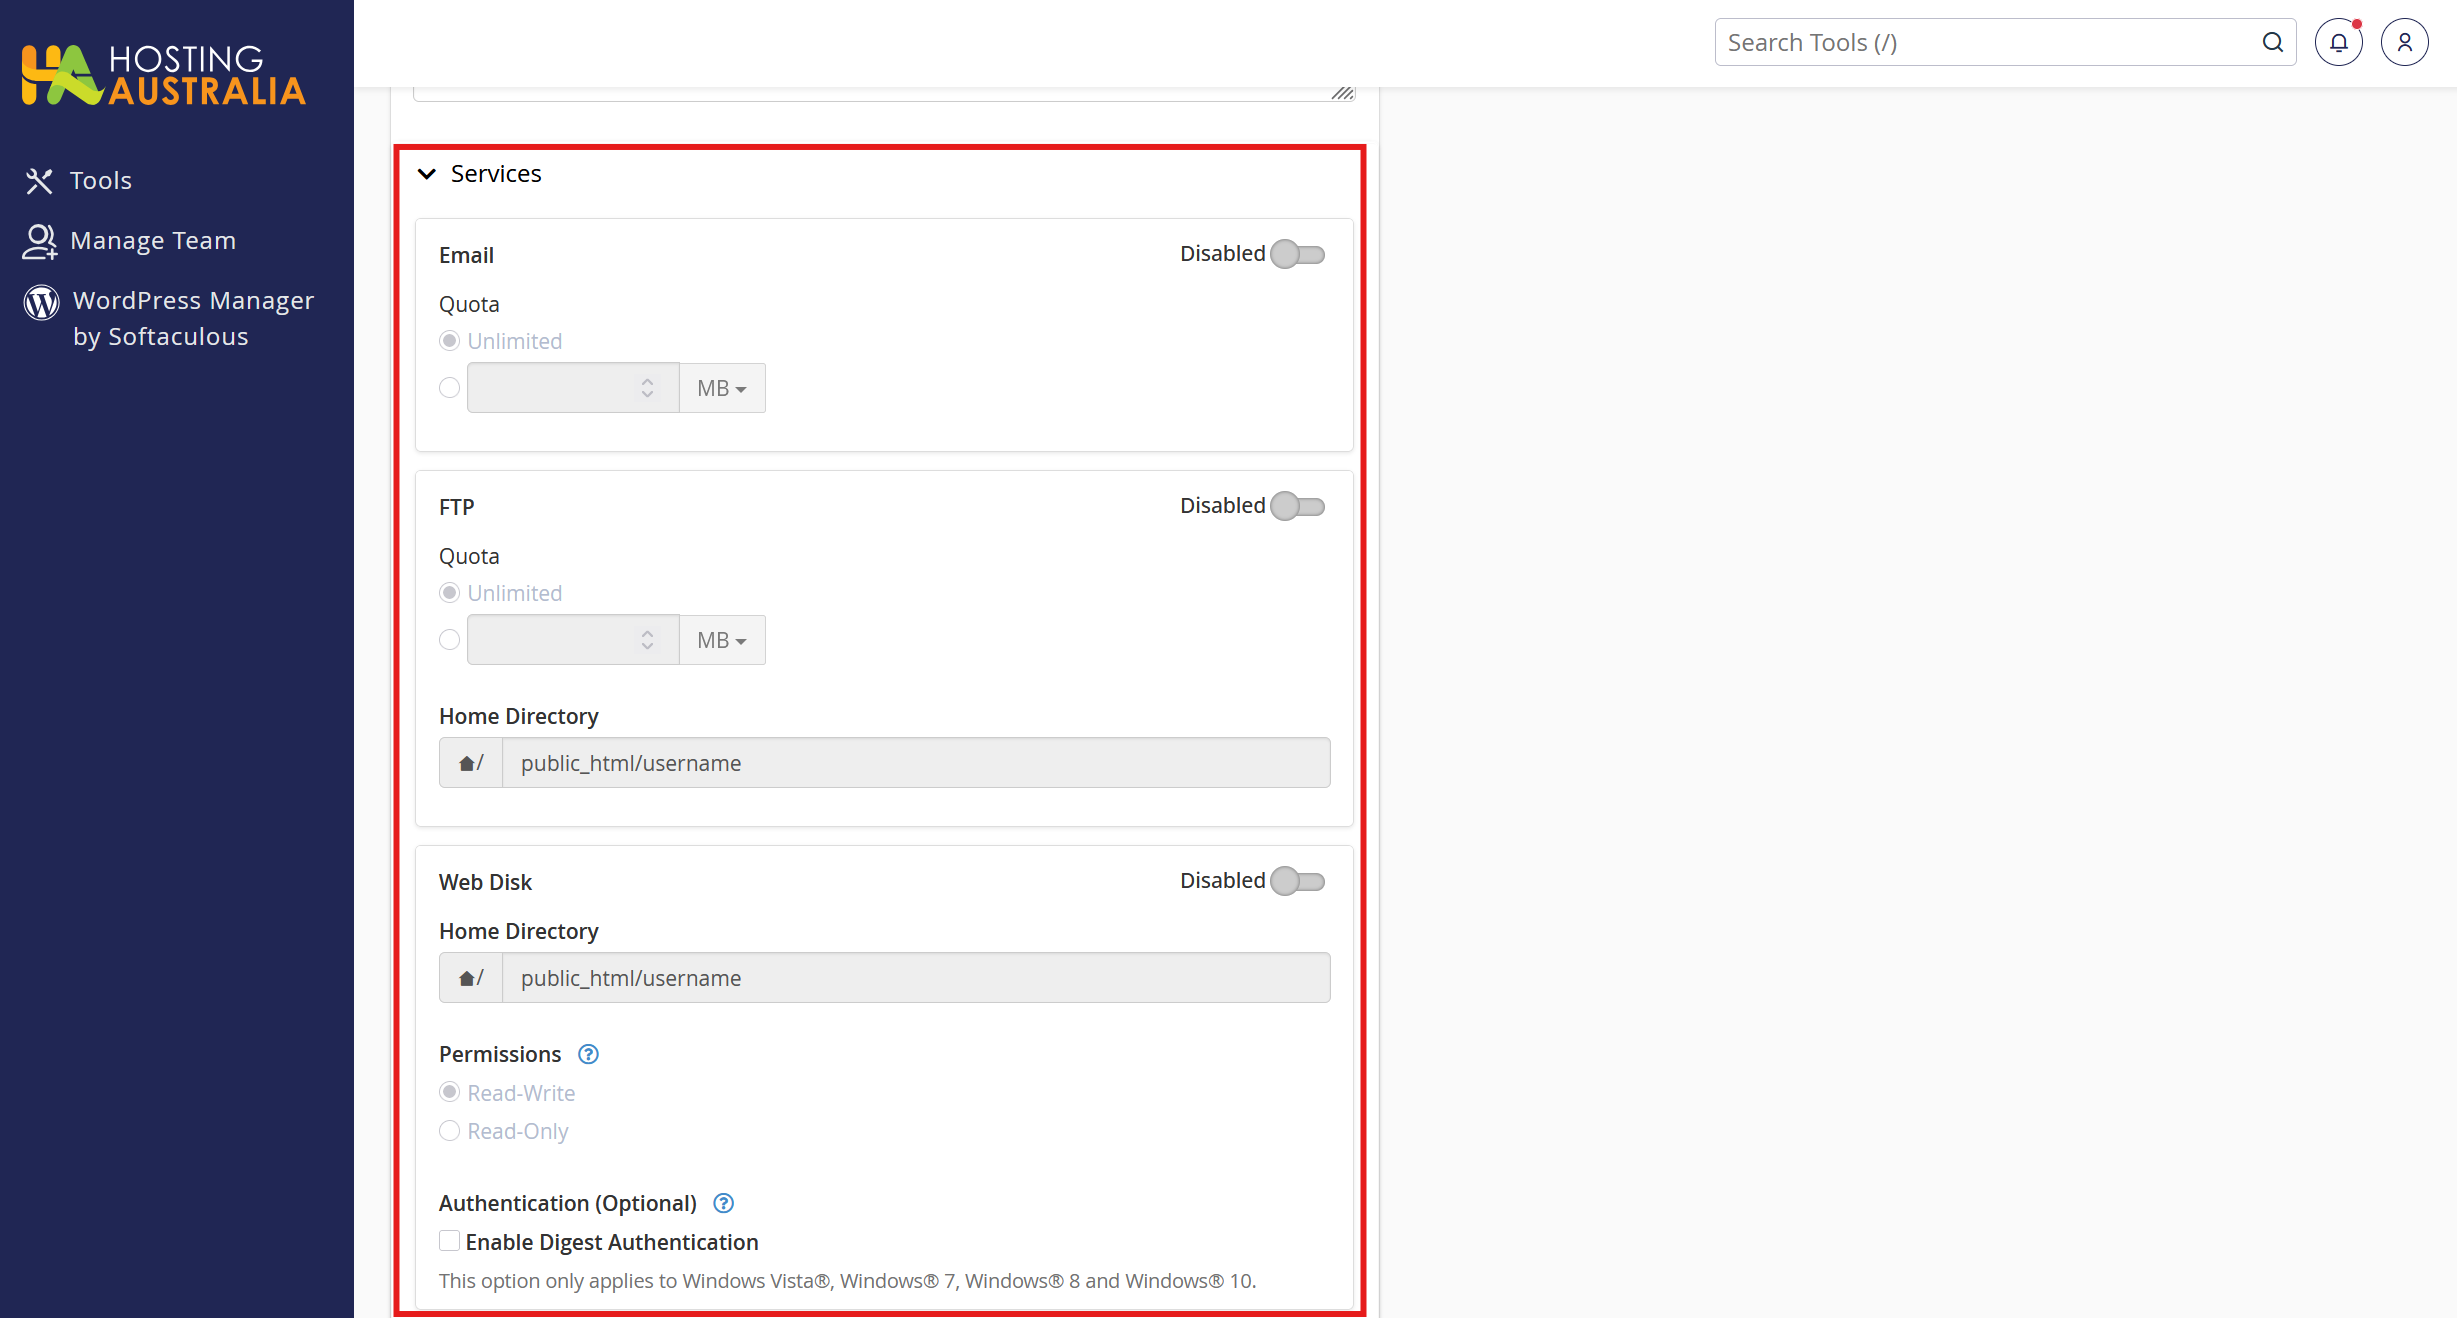
Step 5: Enable Services (Optional)
Independently of Roles, you can grant specific services such as Email, FTP, or Web Disk access. This is useful for giving narrow access without assigning a full Role.
- Email - This service gives the team user access to email for the cPanel account. To enable the Email service, set the toggle to Enabled, then set your desired quota.
- FTP - This service gives the team user access to website files for the cPanel account. To enable the FTP service, set the toggle to Enabled, then set your desired quota.
- Web Disk - This service allows the team user to manage and manipulate files on your server in multiple types of interfaces. To enable the Web Disk service, set the toggle to Enabled. If desired, you may enter a name for the home directory in the Home Directory text box. Then, set your desired permissions. You may choose either Read-Write or Read-Only permissions. You may also enable Digest Authentication.
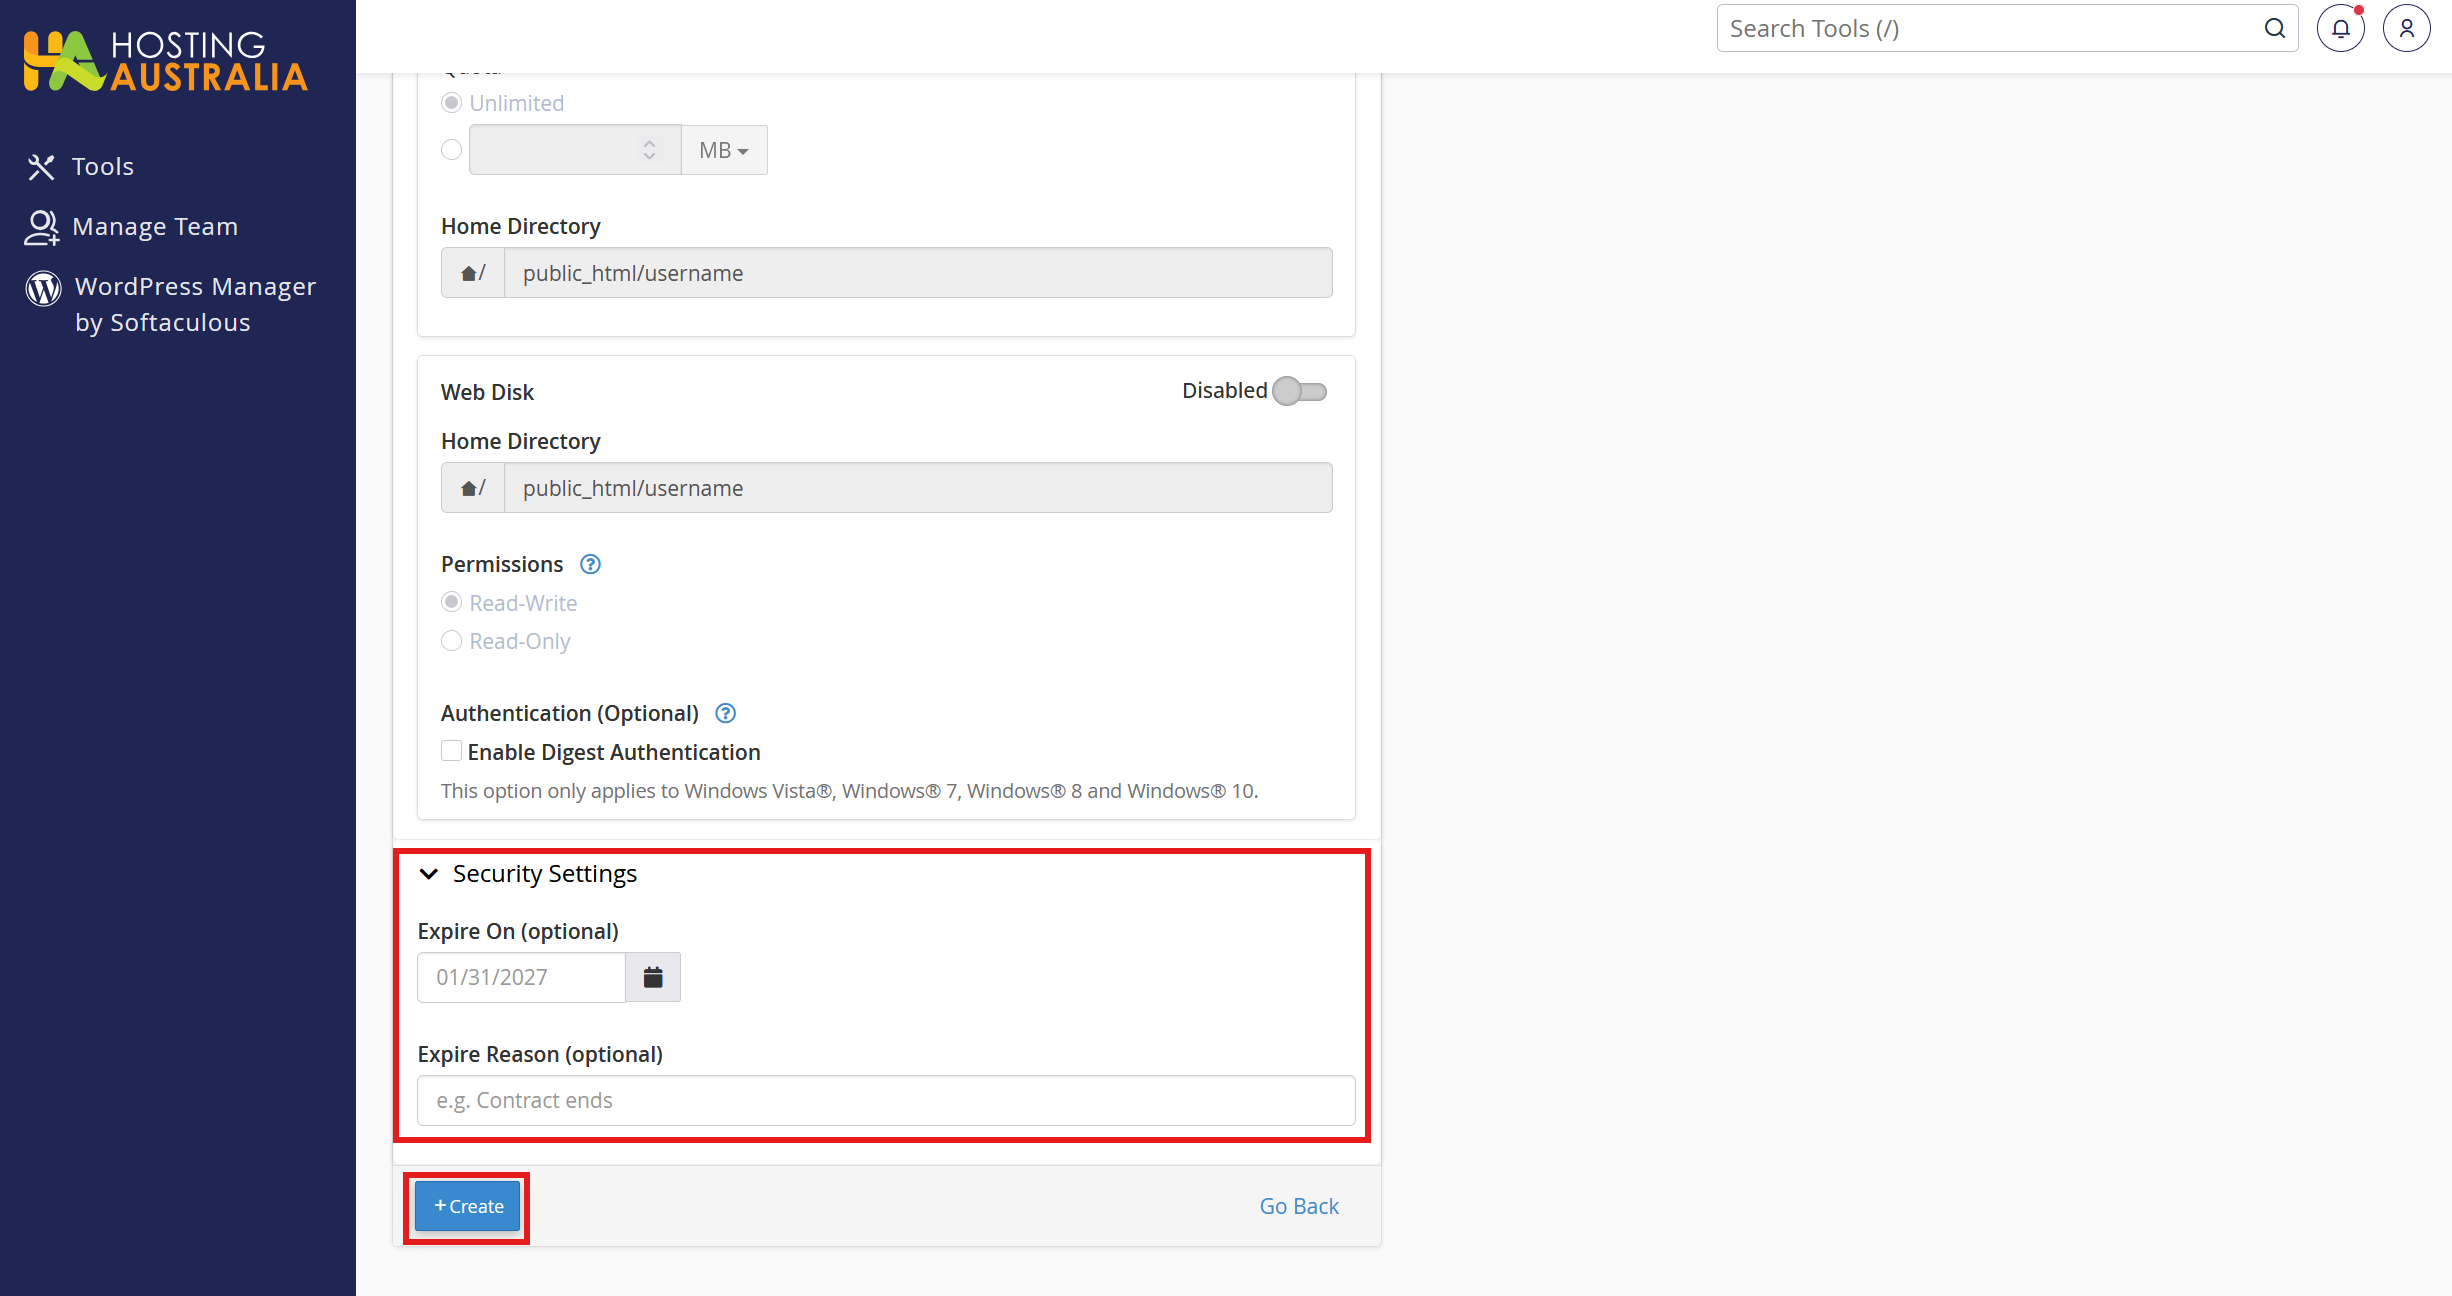
Step 6: Set Security Options and Create.
Optionally set an expiration date so the account automatically loses access on a specific date. Check the box confirming you understand the security implications of granting account access, then select Create.
Step 7: Confirm Creation
cPanel creates the team user and sends an invitation to the contact email provided, so the new user can set their password (if that option was chosen). Team user can now login to you cPanel Account.