Setting Up Email on iPhone & iPad (IMAP)
A step-by-step guide to configuring your Hosting Australia email account on iPhone or iPad using IMAP for full multi-device synchronisation.
Before You Start
Please have the following information ready before proceeding:
- Your full email address — e.g: name@yourdomainname.com.au
- Your email account password
- Your mail server address — which in most cases:mail.yourdomainname.com.au
Recommended Settings
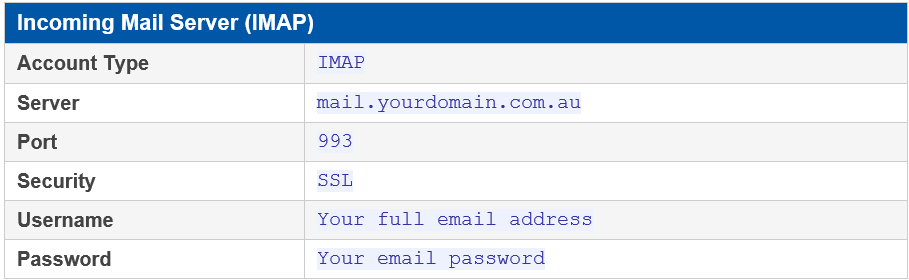
Incoming Mail Server (IMAP)
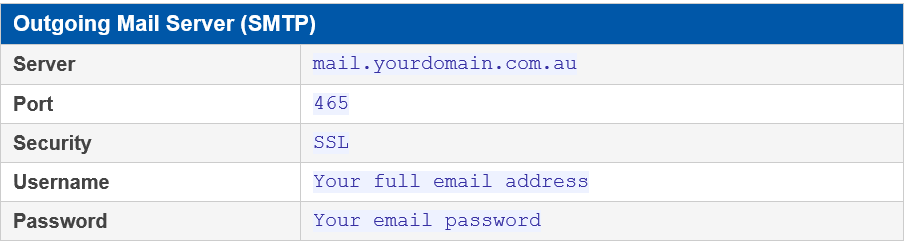
Outgoing Mails Server (SMTP)
Setup Instructions
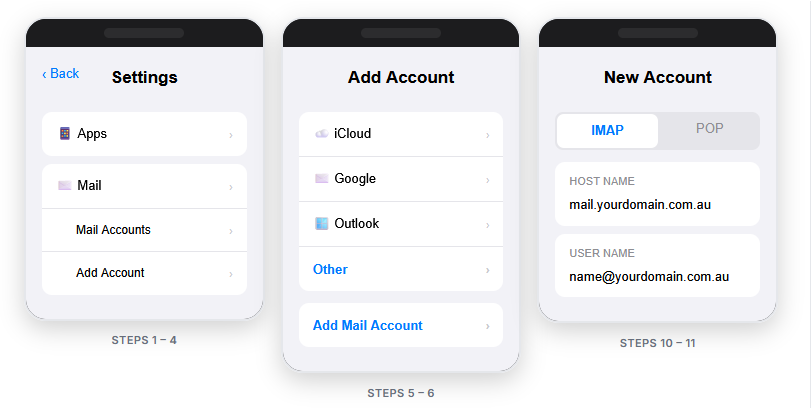
iOS Version Note: The current setup path is: Settings > Apps > Mail > Mail Accounts > Add Account. On older iOS versions this may appear under Settings > Mail > Accounts instead.
- Open the Settings app on your iPhone or iPad.
- Navigate to Apps, then tap Mail.
- Tap Mail Accounts.
- Tap Add Account.
- Select Other from the list of account types.
- Tap Add Mail Account.
- Enter the following account details: Name (your full name), Email (your full email address), Password (your email password), and Description (a label for this account, e.g. Work Email).
- Tap Next.
- Select IMAP at the top of the screen.
- Under Incoming Mail Server, enter Host Name: yourdomain.com.au, Username: your full email address, Password: your email password.
- Under Outgoing Mail Server, enter the same Host Name, Username, and Password as above.
- Tap Next. Your device will verify the account settings.
- Ensure Mail is toggled on, then tap Save.
Note: Outgoing Server Credentials are required, even if the iPhone indicates that the outgoing mail server username and password are optional, they must be entered for email sending to work correctly.
