Before you add the account to Mac Mail, It is important to have all of your server settings and PASSWORD before you attempt to add the account.
These details can be found in your cPanel or webmail. Alternatively, connect through IMAP or POP3 using the information below.
|
Incoming Server Type |
Server Name |
Port Number |
|
POP3 |
mail.yourdomain.com.au |
110 |
|
IMAP |
mail.yourdomain.com.au |
143 |
|
POP3 W/ SSL |
mail.yourdomain.com.au |
995 |
|
IMAP W/ SSL |
mail.yourdomain.com.au |
993 |
|
SMTP |
mail.yourdomain.com.au |
26 |
|
SMTP W/ SSL |
mail.yourdomain.com.au |
465 |
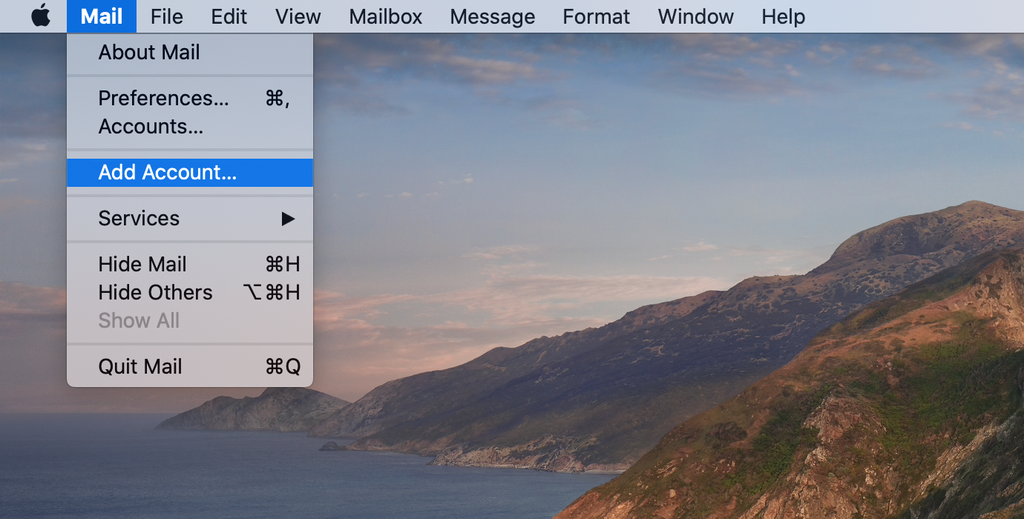
- Open the app. Click on the Mail menu and choose the Add Account option.

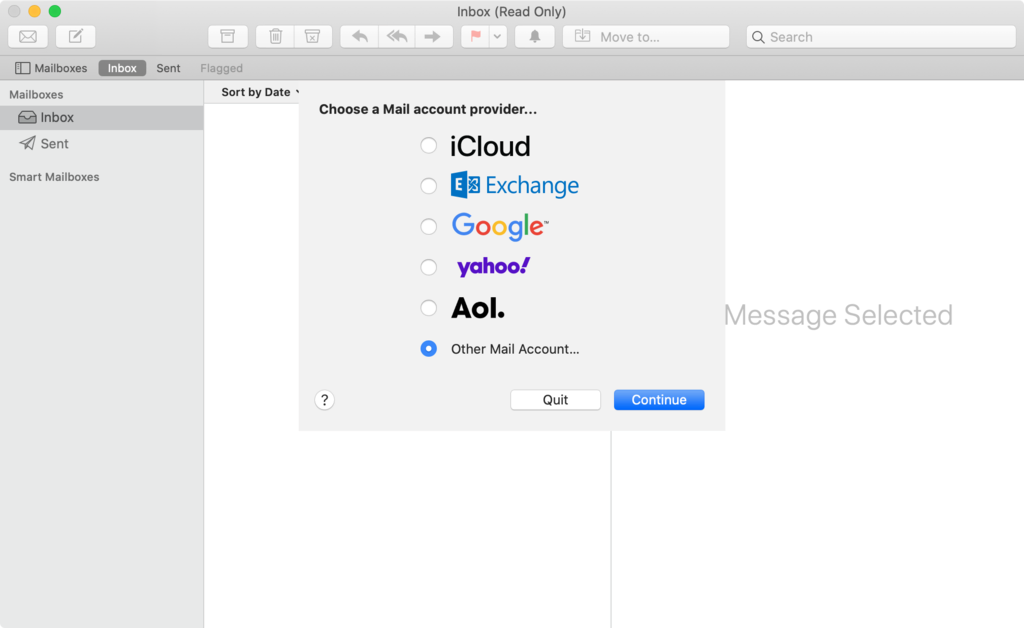
- Select the Other Mail Account option and click Continue.

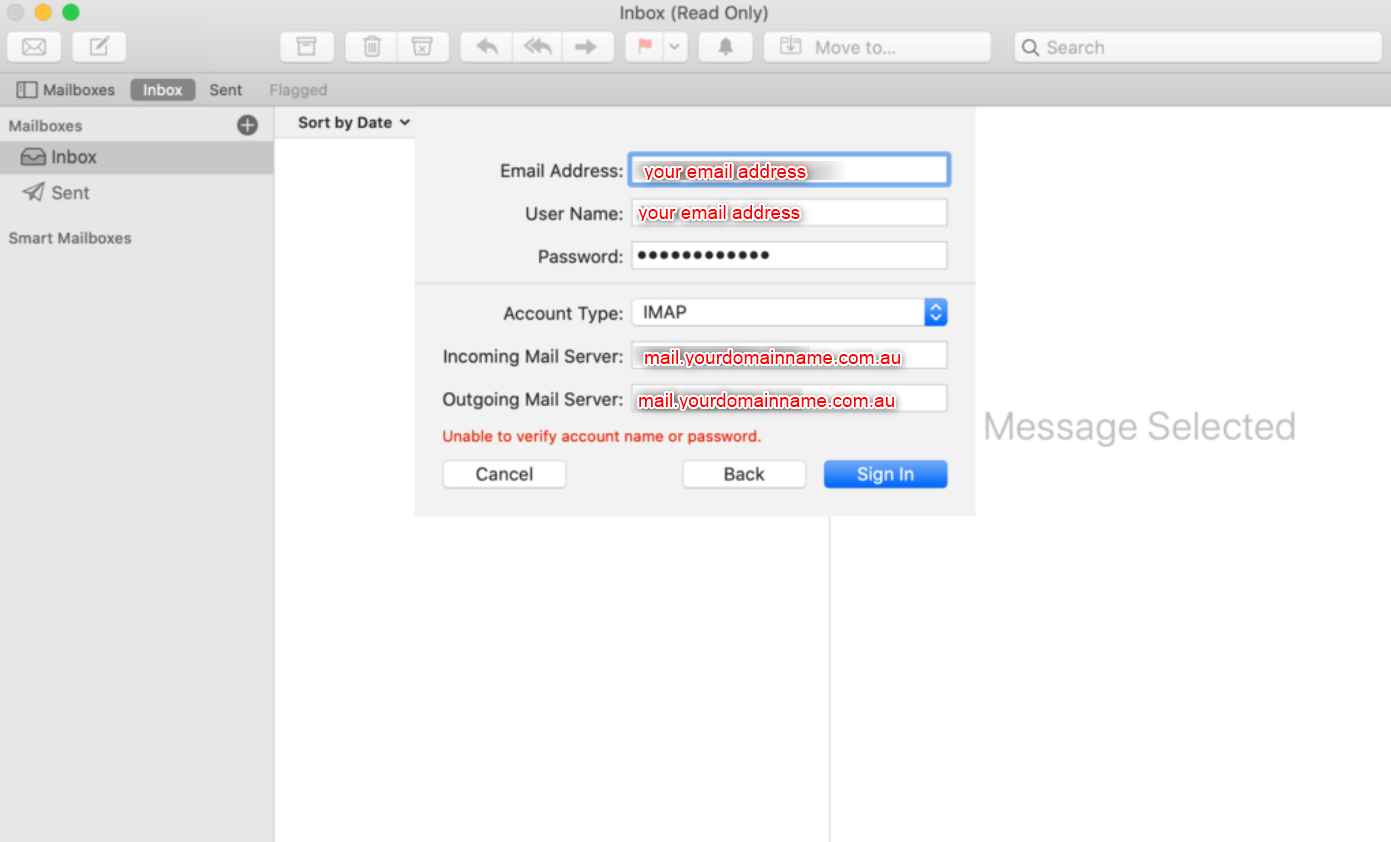
- Add your account information and press Sign In. The app will try to sign in, but the “Unable to verify account name or password” message will appear.
This is normal, as Apple Mail cannot reach the email subdomain and will ask you to input email server details manually.
Here’s a quick guide on these details:
- Email Address – where you have to add your email address.
- User Name – your email address will be used as the user name
- Password – the credentials used to log in to your email account.
- Account Type – you can choose IMAP or POP.
- Incoming Mail Server – the name of your mail server. For example, mail.[yourdomain].com.au
- Outgoing Mail Server – similarly to the incoming mail server. For example, mail.[yourdomain].com.au
For example, hosting-australia.com would be mail.hosting-australia.com for Incoming and Outgoing mail servers.
- Once done, press Sign In.

- If all of the information you input is correct, sign-in should be successful. The Mac Mail app will then ask you which apps you want to use with your new account. Choose preferred apps and press the Done button.
That is it – you have successfully added a new email account to your Mac Mail client. Simply repeat the same process to add multiple email accounts.

