Restoring using JetBackup 5
To do this, follow the below steps:
First, you will need to have access to your cPanel. If you are not sure how to access your cPanel, CLICK HERE.
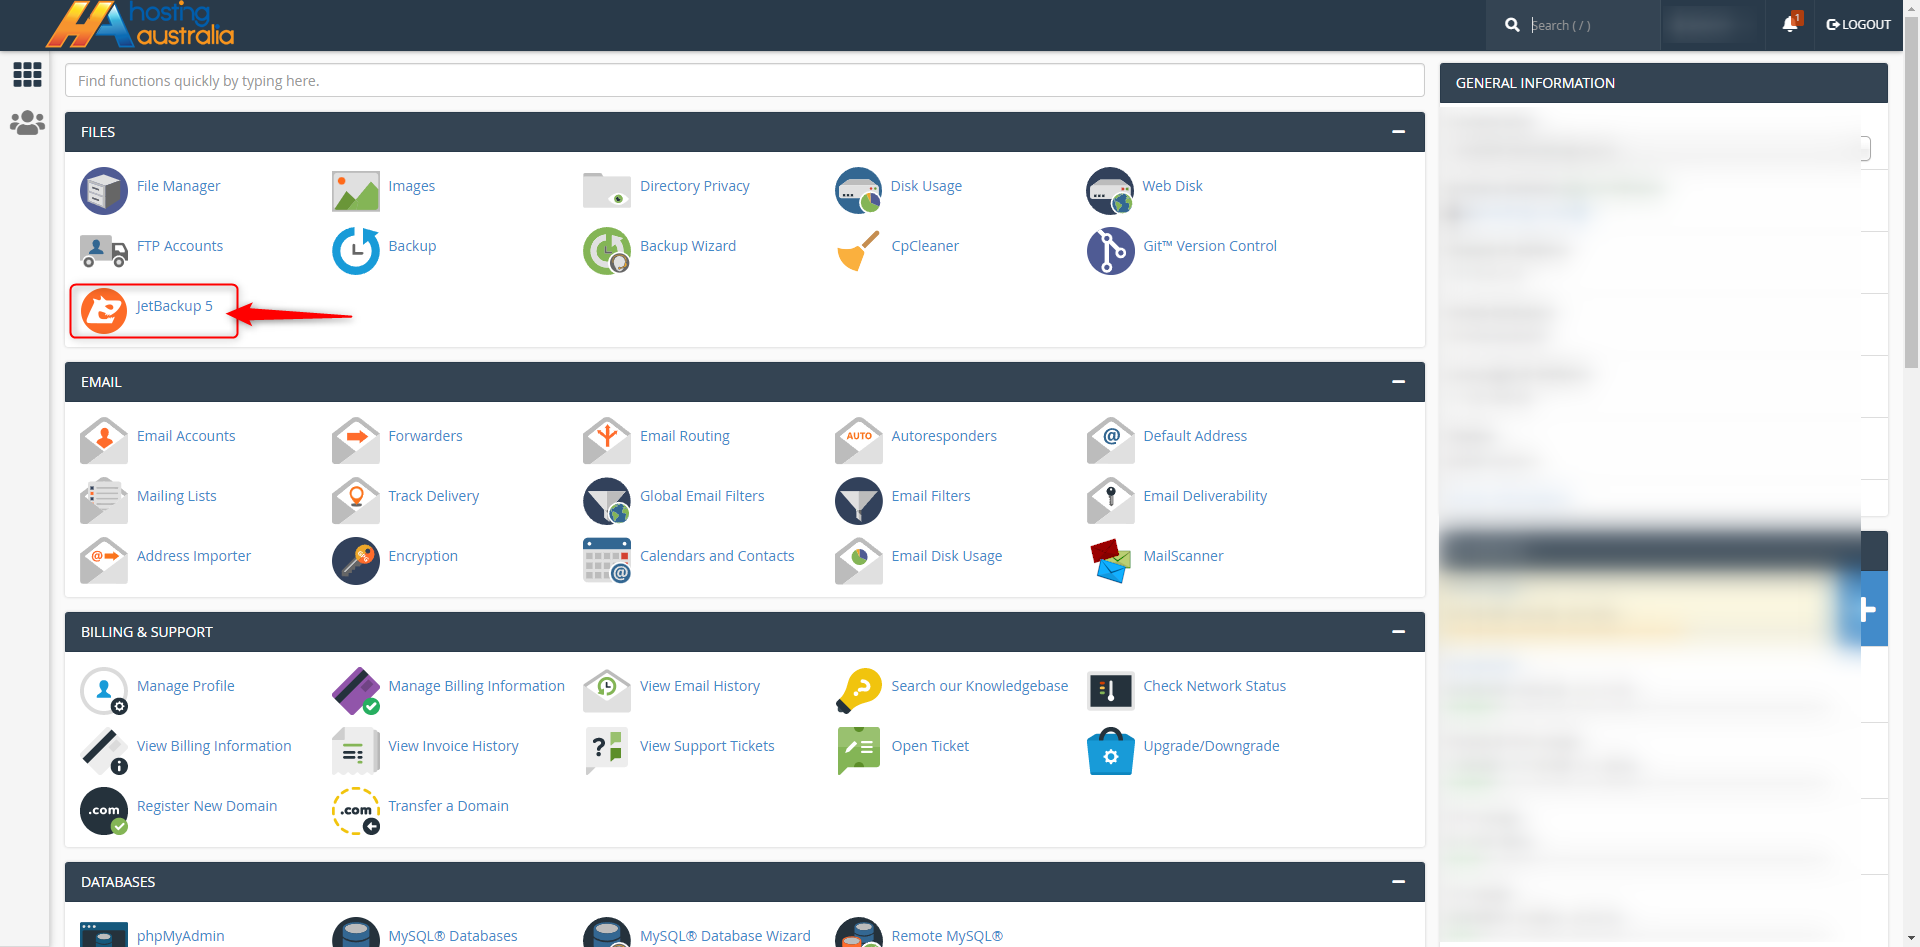
- From the main page in cPanel, click the JetBackup 5 link. This can be found under the Files
header.
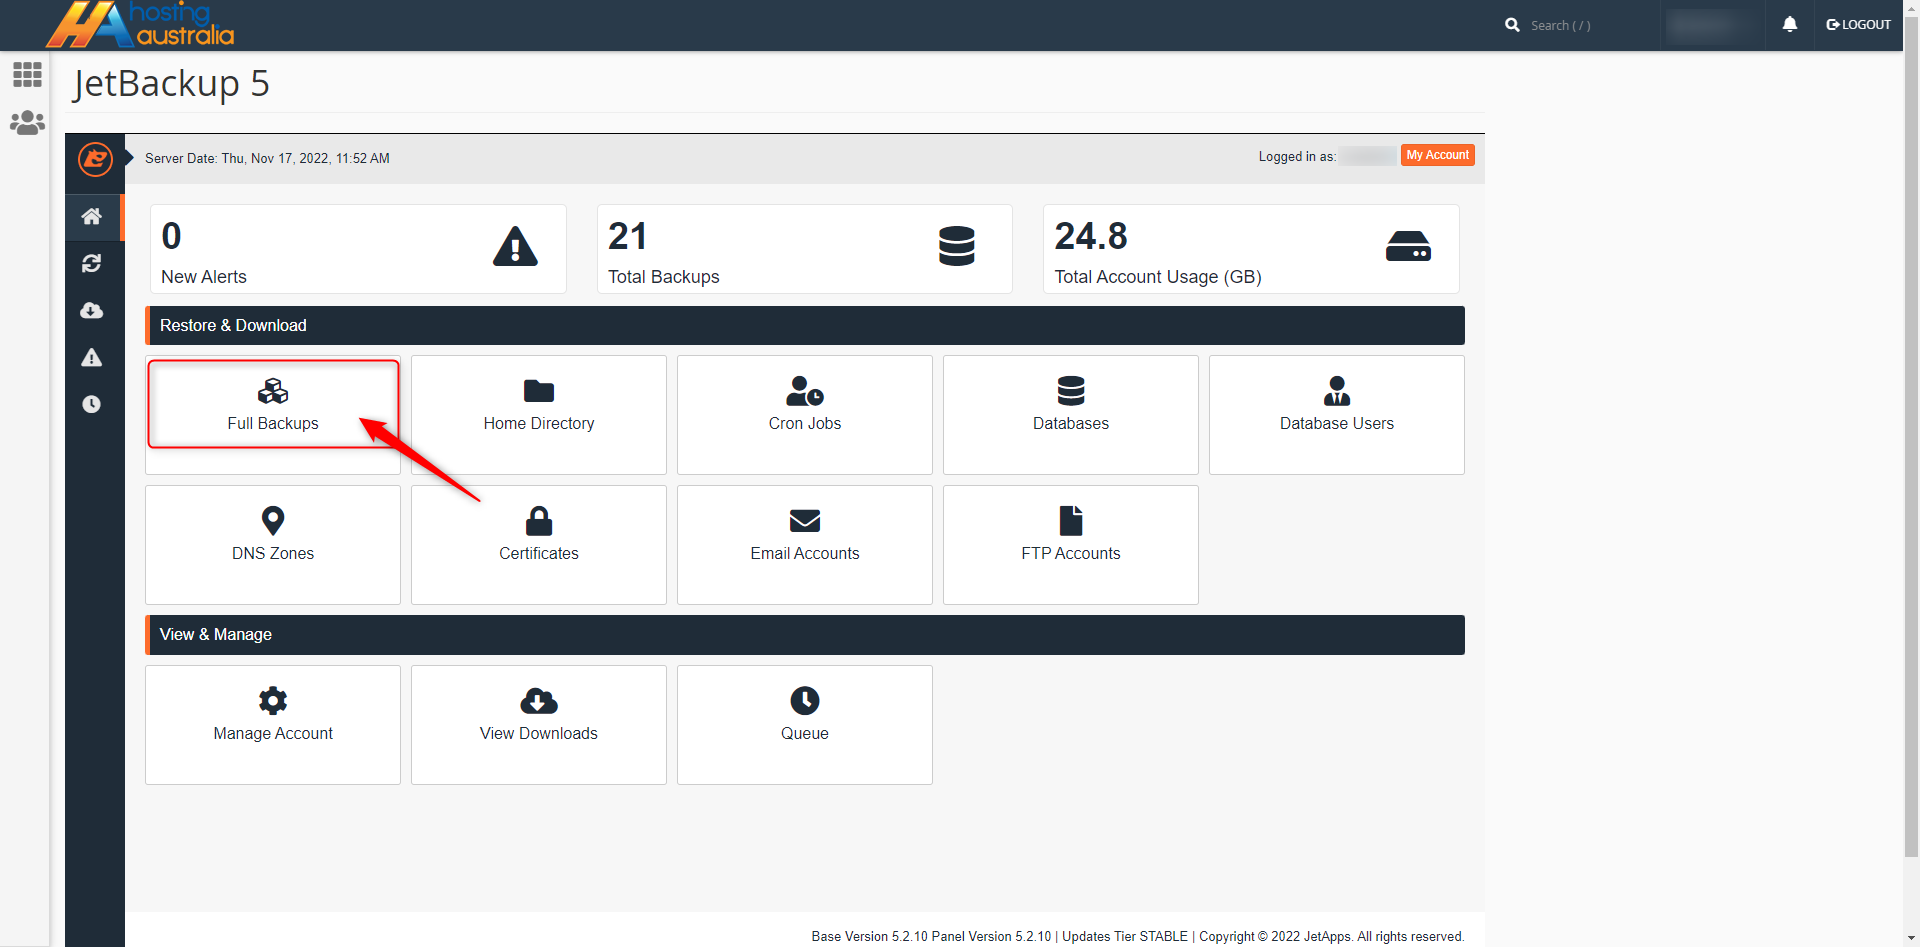
- Click on the icon of the category you would like to Restore. For this example, we will be doing a Full cPanel
Restore.
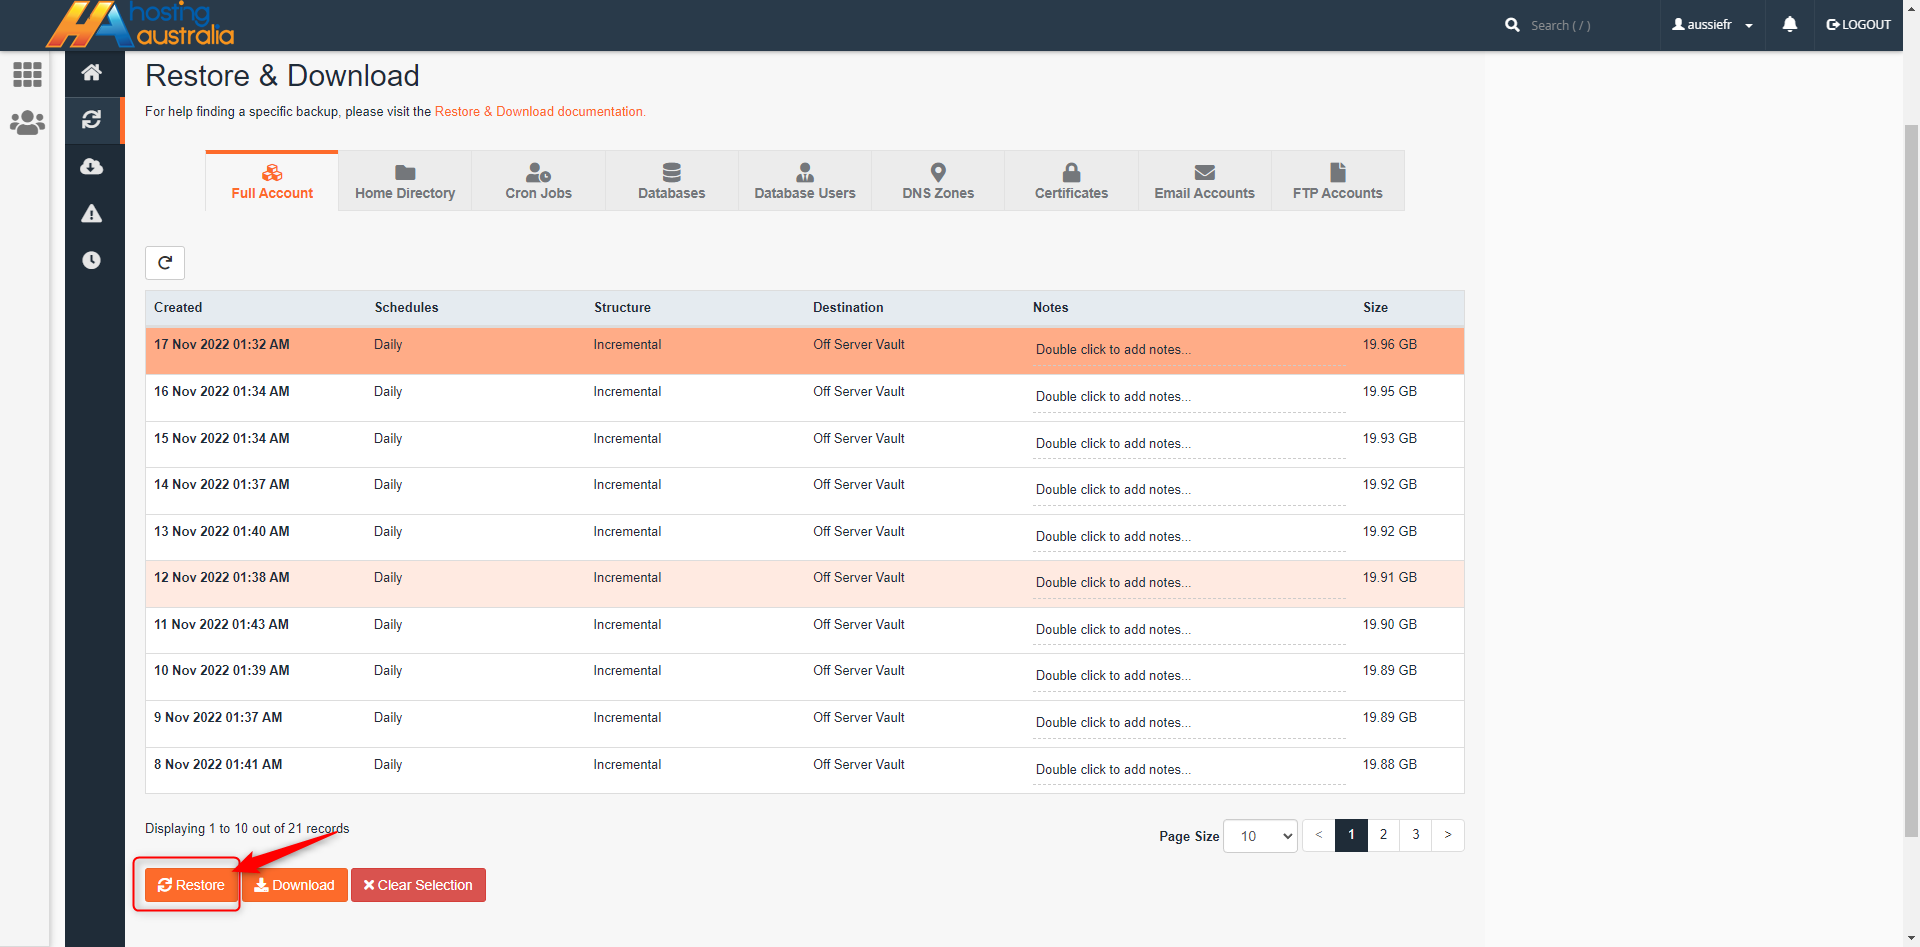
- The restore & Download page allows you to select the exact date you would like to choose. Click on the
the date you would like to restore from then click Restore.
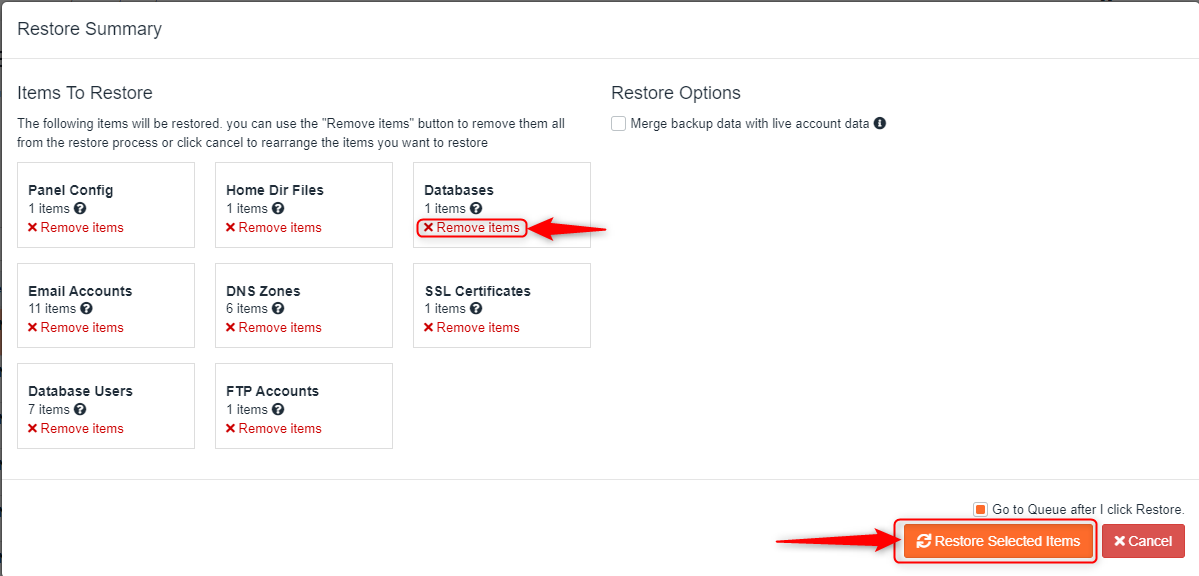
- For the Full cPanel Restore, you can choose what exactly you want to Restore. This is great if made changes
to your DNS but only want to restore email accounts and Home Dir Files. Simply, click on the Remove
Items and they will not be restored.
- The Restore will now go into a queue and the status progress may take a couple of minutes to complete so
there is no need to refresh the page and the status will change with a green tick and completed.
Congratulations the Restore is complete.

