- Login to the client area. New clients will have details in the welcome area, or you can access via our homepage and the MY ACCOUNT link.
- Once logged in, choose SERVICES and then MY SERVICES from the primary menu.
- Click on the green active button alongside the new WordPress Server.
- On VPS Product Detail page, you will see a section simillar to that shown below:
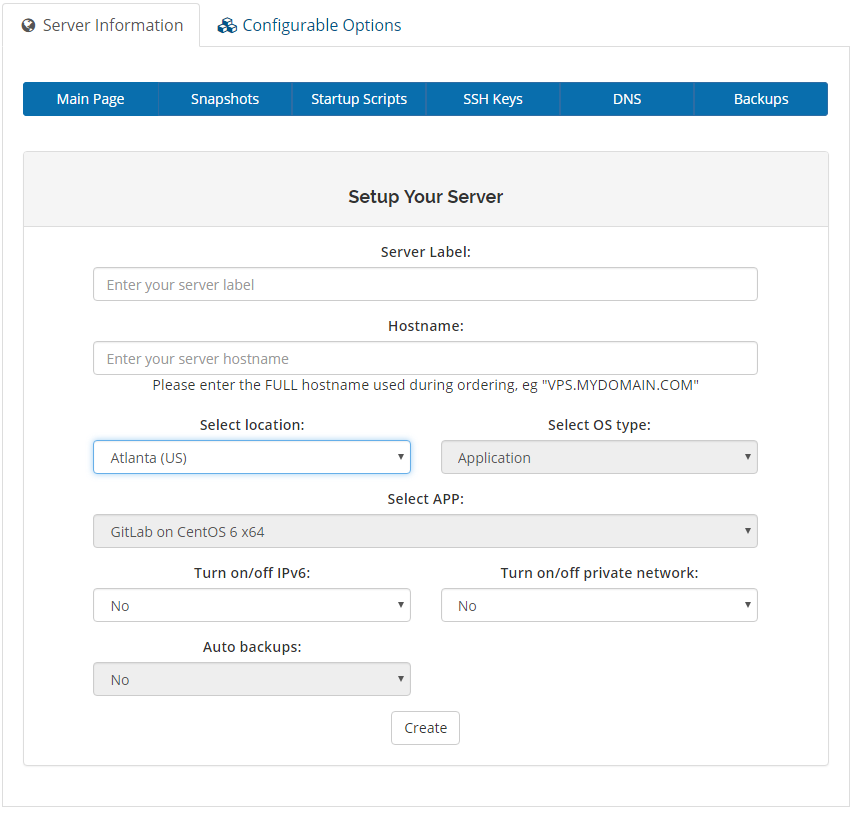
Please complete each value as required. IMPORTANT, see notes on some fields as per below:
SERVER LABEL: This is you internal reference name.
HOSTNAME: You MUST enter the same hostname you specified during the order process. But this must be the FULL host name. For example, if you set the domain to 'mydomain.com.au' and the hostname to 'vps' during the order process, you will need to set this as 'vps.mydomain.com.au'. If you do not enter this, you will receive an error.
SELECT LOCATION: The location you wish to have your VPS located in.
SELECT OS TYPE: This cannot be changed at this point, and has been set during the previous order process. Contact support if you wish to change.
SELECT APP: This cannot be changed at this point, and has been set during the previous order process. Contact support if you wish to change.
TURN ON/OFF IPv6: Advanced users. Generally left blank.
TURN ON/OFF PRIVATE NETWORK: Advanced users. Generally left blank.
AUTOBACKUPS: This cannot be changed at this point, and has been set during the previous order process. Contact support if you wish to change. - Once you have completeted the above, click on CREATE. Setup will then commence and normally takes around 2-5 minutes.
- Home
-
Store
- Browse All
- Personal Web Hosting Packages
- Business Web Hosting Packages
- Reseller Hosting
- Backup Services
- Email & SPAM Protection
- Website Design
- Windows Plesk Hosting
- SSL Certificates
- Microsoft 365 Services
- WordPress LiteSpeed Hosting
- Contract Support
- PrePaid Support
- FusionWM
- Security Products
- Wordpress and Joomla Products
- SiteLock Malware Protection
- VPS Servers
- SEO Products
- Affiliate Products
- SMTP Mail
- Website Security
- VPN
- Register a New Domain
- Transfer Domains to Us
- Announcements
- Knowledgebase
- Network Status
- Affiliates
- Contact Us
-
More
